Popcorn Ceiling Removal
Popcorn ceilings, once a popular trend, are now outdated and often considered an eyesore in modern homes. If you’re ready to bid farewell to this textured relic of the past, you’re not alone. Popcorn ceiling removal is a transformative project that can instantly modernize your space and enhance its visual appeal. Here’s your guide to achieving a smooth, contemporary look for your ceilings.
-
Assess the Situation: Before diving into popcorn ceiling removal, assess the condition of your ceilings. Determine whether they contain asbestos, a hazardous material commonly used in older popcorn ceilings. If your home was built before the 1980s, it’s advisable to have a professional test for asbestos before proceeding with removal.
-
Gather the Right Tools: Removing popcorn ceilings requires the proper tools and equipment to ensure a smooth and efficient process. Arm yourself with essentials such as a putty knife or scraper, plastic sheeting to protect floors and furniture, a spray bottle filled with water, and safety gear including goggles, a dust mask, and gloves.
-
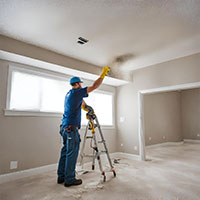
Prep the Space: Prepare the room for popcorn ceiling removal by removing furniture, covering floors and fixtures with plastic sheeting, and turning off electricity to avoid any accidents with lighting fixtures. It’s also helpful to seal off doorways and vents with plastic to minimize dust and debris from spreading to other areas of the home.
-
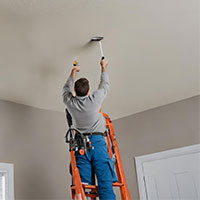
Wet and Scrape: To make popcorn ceiling removal easier, spray a small section of the ceiling with water using a spray bottle. Allow the water to penetrate the texture for a few minutes, then gently scrape away the popcorn texture using a putty knife or scraper. Work in small sections to avoid damaging the underlying drywall or plaster.
-
Smooth and Repair: Once the popcorn texture has been removed, assess the condition of the ceiling surface. Repair any imperfections such as cracks, holes, or uneven areas using joint compound or spackling paste. Sand the surface smooth once the repairs have dried to achieve a seamless finish.
-
Prime and Paint: Before painting your newly smooth ceiling, apply a coat of primer to ensure adhesion and uniform coverage. Choose a high-quality paint in your desired finish and color to complement the overall aesthetic of your space. Use a roller or paint sprayer for even application, and allow the paint to dry completely before reassembling the room.
-
Enjoy Your Modernized Space: Once the paint has dried and the room has been reassembled, step back and admire the transformation. The removal of popcorn ceilings can dramatically modernize your space, creating a clean and contemporary look that enhances the overall ambiance of your home.
Embrace the opportunity to update your home with popcorn ceiling removal, and say hello to a fresh, modern aesthetic that reflects your personal style and taste.
So if you need a Popcorn Removal service ? Contact us for a consultation and rediscover the beauty of smooth, modern living.